
chapter 7
Circles
1.

Circle Methods
Fundamentals
There are a few primary methods that are used when performing circles.
When riding circles, each rider will use a series of different methods to help ensure that the circle shape is correct, gaps are even and that the riders are comfortable.
Circle Gaps
To adjust gaps on a circle, the riders will change their tapping speed instead of using typical gap adjustments, like walking or cantering. While riding a circle, the riders gently tap their "inside key" in a smooth rhythmic pattern and to adjust gaps they will gently tap faster or slower to either catch up or slow down.
Improper Adjustment
When riding a circle, the riders will never walk, canter, or wiggle to adjust their gaps. This would be considered an improper adjustment.
Walking
Cantering
Wiggling
Proper Adjustment
When riding a circle, the riders will adjust their gaps by changing their tapping speed or by using horseshoes.
Tap Slower
Tap Faster
Horseshoes
Tapping faster or slower allows the rider to adjust their gap size easily, without affecting the circle shape by changing gaits. If the rider's gap is too large, they will tap faster - if the rider's gap is too small, they will tap slower.
Tapping Faster
When a rider taps their directional key faster, this will cause their horse to make a slightly smaller circle and therefore their horse's head is placed to the inside of the rider ahead. In doing this, the rider will begin to get closer to the rider ahead of them.
Tapping Faster Demo
The video below demonstrates how a rider would tighten their gap when riding on a circle.
The rider gently taps their inside key quickly, which places their horse's nose to the inside of the rider ahead - thus drawing them closer, making their gap smaller.

Tapping Slower
When a rider taps their directional key slower, this will cause their horse to make a slightly larger circle and therefore their horse's head is placed to the outside of the rider ahead of them. In doing this, the rider will begin to create more space from the rider ahead of them.
Tapping Slower Demo
The video below demonstrates how a rider would make their gap larger when riding on a circle.
Note, the demo in the video is an exaggerated example.
The rider gently taps their inside key slower, as they are passing the rider they should be following. They make a slightly larger circle until they are in the correct gap size.

tip for commanders...
Riding circles for a long period of time is very difficult on the riders as they are constantly tapping and trying to hold their camera up to avoid becoming dizzy. Try to avoid keeping the riders in a circle for longer than a few minutes at a time. It is highly recommended that circle work is broken up with short breaks, so that the riders can rest their fingers. You can provide breaks by halting the rider line or asking them to exit the circle and ride along the wall then renter the circle from the other side of the arena.
Breaks in general are very important, as performing dressage for an hour straight is strenuous. Be sure to halt the riders occasionally and provide short breaks where the members can step away from their computer.
Breaks greatly improve learning ability and attention span!
2.
Metered Circles
Circle Design
Metered circles are designed using the meter system, inspired by metered circles used in real dressage, which is a series of numbered sizes - aka distances. Each metered circle has a center point and 4 markers.
All metered circles follow a specific design.
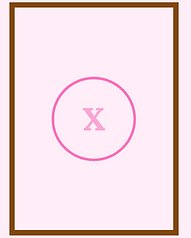
X is the center point. In-line with X on center line and midline, there are 4 markers that land onto a related metered sand line. The 4 markers are what riders aim for to make the circle shape.

Within the meter system, there are two types of meters: whole meter and point 5 meter.
The meter system is used for both metered circles and metered sand lines.
Meter Markers
There are three fundamental rules to meters:
1. Meters use two specific markers: bright dots and spacings.
2. Meters have two specific sizes: whole meter (5) and point 5 meter (2.5).
3. Whole meters use bright dots and point 5 meters use spacings.
All metered circles and sandlines use two specific markers: bright dots and spacings.

Whole metered circles and sand lines use the bright dots while point 5 metered circles and sand lines use spacings.
Reminder: Spacings and spacing lines are the exact middle point between two bright dots or two dotted sand lines. Spacings and spacing lines do not have a definitive visual marker, sometimes it could be a pebble line while other times it could be a faded dot line.
5 meters is the distance from one bright dot to the next bright dot, or from one spacing to the next spacing.

2.5 meters is the distance from a bright dot to a spacing, or vice versa.
PQL created the Point 5 Meter to enhance the precision of circles and sandlines! 2.5, 7.5, 12.5, and 17.5 allow for more exact markers and also provide for more circle and sand line options. Without Point 5 Meters we would not have the ability to adjust markers to fit different gait curl-overs and so much more.
Meter System
The meter system is a series of numbers that measure distance. The meter system is used for naming specific sand lines and circles. The meter system was designed inspired by the meter system used in real dressage.
Meter Sizes
There are 8 meter sizes total.
4 whole meter and 4 point 5 meter.
There are 8 metered circle sizes.
2.5 5 7.5 10 12.5 15 17.5 20
Whole Meter
5 Meter
10 Meter
15 Meter
20 Meter
Point 5 Meter
2.5 Meter
7.5 Meter
12.5 Meter
17.5 Meter

The 8 meter sizes are counted in increments of 2.5.
Or, they are counted in increments of 5 if counting per type of meter:
Whole Meter: 5 - 10 - 15 - 20
Point 5 Meter: 2.5 - 7.5 - 12.5 - 17.5


This diagram showcases the 8 metered circle sizes and their markers.
There are 8 metered circle sizes total and each circle has 4 markers: one marker on center line for C wall, once marker on midline for B wall, one marker on center line for A wall, and one marker on midline for E wall. Each of the markers land on their related metered sand line.

Naming Circle Markers
All metered circle markers have specific names.
To name a metered circle marker, first stand on X facing towards one of the arena walls (C, B, A, or E). Then, count the number of meters the circle size is away from X. The bright dot or spacing you land on is the metered circle marker for that size of the circle. Keep in mind, that the circle marker should be on center or midline.
There are four markers for every metered circle: 4 bright dots or 4 spacings.
The name of the circle marker is meter size + related wall.
How it Works
For example, the diagrams below demonstrate how the 10 Meter Circle Markers are named. From X, count 10 meters towards each wall of the arena (count 2 bright dots away from X towards each wall of the arena). The bright dots you land on are the markers for the 10 meter circle.
10 Meter C + 10 Meter B + 10 Meter E + 10 Meter A = 10 meter circle markers.

To name any marker within the arena, you would use the Crosshairs Method.
This method is also used for circles that are not based around X, such as "anywhere" circles (explained at the bottom of this chapter).
Counting Method
Metered circles can be ridden using a counting method. This method is based off of counting a certain number of bright dots or spacings away from X.
To do this, riders will stand on X facing center or midline, and count a certain number of bright dots or spacings away from X towards the four walls of the arena.
Counting Meters
The counting method starts at 1 and ends at 4. An easy way to do this is to break up the two types of metered circles into their own groups (whole meter & point 5 meter), which makes 4 sizes per group (5, 10, 15, 20 and 2.5, 7.5, 12.5, 17.5).
Whole Meter
5 meter is the first whole meter number, count 1 bright dot from X.
10 meter is the second whole meter number, count 2 bright dots from X.
15 meter is the third whole meter number, count 3 bright dots from X.
20 meter is the fourth whole meter number, count 4 bright dots from X.
Point 5 Meter
2.5 meter is the first point five meter number, count 1 spacing from X.
7.5 meter is the second point five meter number, count 2 spacings from X.
12.5 meter is the third point five meter number, count 3 spacings from X.
17.5 meter is the fourth point five meter number, count 4 spacings from X.


For example, to ride a 10 meter circle: count 2 bright dots away from X for each wall of the area. From X towards the 4 walls of the arena, find the second bright dot that is in-line with center and mid line and those 4 bright dots are the markers you want to aim for while riding a 10 meter circle.
Reminder, each circle has 4 markers (4 bright dots or 4 spacings).
Counting Chart
2.5 Meter
Count 1 spacing from X.
7.5 Meter
Count 2 spacings from X.
12.5 Meter
Count 3 spacings from X.
17.5 Meter
Count 4 spacings from X.
5 Meter
Count 1 bright dot from X.
10 Meter
Count 2 bright dots from X.
15 Meter
Count 3 bright dots from X.
20 Meter
Count 4 bright dots from X.
Metered Circle Diagrams
2.5 Meter

The 2.5 meter circle is the smallest circle size. In the diagram, the pink dots represent the markers while the pink lines represent the 2.5 meter sand lines for the four arena walls. The 2.5 meter circle is a point 5 meter size, therefore its markers will be spacings - count 1 spacing away from X.
20 meter circle is the largest circle size because the 20 meter markers for E and B wall land on the wall line, therefore a larger circle can not be performed. The 20 meter markers for A and C wall land on the dotted line before the Quarter Line (between letters M/H and F/K).
3.
Circle Placements
Placement Types
There are 3 types of placements to perform metered circles. Placement refers to the location of where the metered circle is being performed.
1. X Circles: circles performed around X.
2. Off Wall: circles performed off of an arena wall.
3. Anywhere: circles performed anywhere within the arena.
Each circle placement has its own method.
X Circles
X Circles are circles that are performed using X as the center point.
X circles use the meter system and the circle markers are based off of the metered sandlines. This circle placement is the most common.
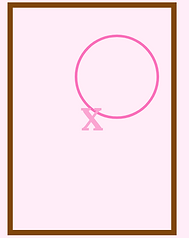
Off The Wall Circles
Off the wall circles are circles that are performed along an arena wall and have a wall line as one of the 4 markers.
To perform off the wall circles, stand along one of the wall lines facing in towards the arena, then count however many meters the circle is away from the wall. The marker you land on will be the center point. Then, count the same number of meters away from the center point for the 3 remaining walls - those markers will be the markers that the riders will aim for to perform the circle size. The wall line will be the 4th marker.

Anywhere Circles
Anywhere Circles are circles that a performed anywhere within the arena and have a specific marker as the center point.
To perform anywhere circles, select any bright dot or spacing to be the center point - this marker will act like X. Unlike regular circles around X, you can not base the circle markers off of the metered sand lines - instead, you will use the counting method to find the circle markers. From the center point, count however many meters the circle size is away for each of the four walls.
Placement Examples
off the wall circle example
To perform a 10 meter circle off of B wall:
-
Stand on the wall line for B wall. From the wall line, count 2 bright dots in towards the arena (count 10 meters). The bright dot you land on will be the circle's center point.
-
Then, count 2 bright dots toward A wall - that bright dot will be the first of the 4 circle markers.
-
Go back to the center point dot and count 2 bright dots towards E wall - that bright dot will be the second circle marker.
-
Lastly, go back to the center point dot and count 2 bright dots toward C wall - that bright dot will be the third marker.
-
The bright dot along the B wall line is the fourth marker.

anywhere circle example
To perform a 7.5 meter anywhere circle with 15C/5E as center point:
-
Stand on the 15C/5E bright dot, this is your center point: the new X. From that dot, count 2 spacings towards B wall, the spacing you land on is the first circle marker.
-
Go back to the center point and count 2 spacings towards A wall, that spacing is the second circle marker.
-
Go back to the center point and count 2 spacings towards E wall, that spacing is the third marker.
-
Go back to the center point and count 2 spacings towards C wall, that spacing is the fourth marker.

diagrams are zoomed in
4.
Pinwheels
Pinwheel Methods
Pinwheels are performed by having a number of riders each on their own specified circle size. Each rider will be in a specific gait, the larger the circle, the faster the gait. The riders will maintain curved comb alignment with their "anchor" (the rider on the smallest innermost circle) and the anchors will maintain arena timing.

For example, a four spoke pinwheel would have 4 riders walking on a 5 meter circle, 4 riders trotting on a 10 meter circle, and 4 riders cantering on a 15 meter circle. Each "spoke" of riders will maintain curved comb alignment with the rider walking on the 5 meter circle. The 4 walking riders will maintain arena timing with the rider directly across from them.
A variety of methods are use to ensure the pinwheel is performed correctly.
Methods
Anchoring
Curved Comb
Circle Fundamentals
Arena Timing
Adjustments
Meters
4 Spoke Rotary Pinwheel Example
Timestamp: 13:22
In PQL's "The Queen's Olympiad" record breaking routine, a 12 rider 4-spoke rotary pinwheel is performed.
To learn more about pinwheels and the methods used to perform pinwheels, visit the PDM Pinwheel Diagrams Canva document. Within the document, there is a variety of pinwheel diagrams and methods demonstrating how pinwheels are performed.

